Your own VPN
Nanocl aim to make your life easier so we have a prebuilt VPN Statefile.
Based on hwdsl2/docker-ipsec-vpn-server from @Lin Song you can use it from our Official Nanocl Repository
nanocl state apply -fs nr.next-hat.com/v0.18/ipsecYou can view the manual of this Statefile with:
nanocl state man -s nr.next-hat.com/v0.18/ipsecIf you want to tweak it more than what is already possible from the Statefile Args, you can download it and customize it to fit your needs:
wget nr.next-hat.com/v0.18/ipsecHere is the content of the VPN Statefile:
ApiVersion: v0.18

Args:
- Name: namespace
  Kind: String
- Name: public-ip
  Kind: String
- Name: dns
  Kind: String
  Default: "1.1.1.1"

Namespace: ${{ Args.namespace }}

# See all options:
# https://docs.next-hat.com/references/nanocl/objects/cargo
Cargoes:
- Name: vpn
  PortBindings:
    500/udp:
    - HostPort: "500"
    4500/udp:
    - HostPort: "4500"
  Containers:
  - Name: vpn
    Image: hwdsl2/ipsec-vpn-server:latest
    Env:
    - VPN_PUBLIC_IP=${{ Args.public-ip }}
    - VPN_DNS_SRV1=$$INTERNAL_GATEWAY
    - VPN_DNS_SRV2=${{ Args.dns }}
    - VPN_L2TP_NET=192.168.42.0/16
    - VPN_L2TP_LOCAL=192.168.42.1
    - VPN_L2TP_POOL=192.168.42.10-192.168.42.254
    - VPN_XAUTH_NET=192.168.43.0/16
    - VPN_XAUTH_POOL=192.168.43.10-192.168.83.254
    HostConfig:
      Binds:
      - /opt/vpn:/etc/ipsec.d
      - /lib/modules:/lib/modules
      CapAdd:
      - NET_ADMIN
      Devices:
      - PathOnHost: /dev/ppp
        PathInContainer: /dev/ppp
        CgroupPermissions: rwm
      Sysctls:
        net.ipv4.ip_forward: "1"
        net.ipv4.conf.all.accept_redirects: "0"
        net.ipv4.conf.all.send_redirects: "0"
        net.ipv4.conf.all.rp_filter: "0"
        net.ipv4.conf.default.accept_redirects: "0"
        net.ipv4.conf.default.send_redirects: "0"
        net.ipv4.conf.default.rp_filter: "0"
        net.ipv4.conf.eth0.send_redirects: "0"
        net.ipv4.conf.eth0.rp_filter: "0"
You can use it in the following way:
nanocl state apply -fs nr.next-hat.com/v0.18/ipsec -- --namespace private --public-ip $(curl -s http://ipinfo.io/ip)From the file above, you can notice that we create a custom DNS for our VPN.
This allows us to create and override existing domains and redirect them to our Cargoes.
But before connecting to the VPN, you can retrieve the credentials using this command:
nanocl cargo -n private logs vpnYou should be able to see something like this:
================================================

IPsec VPN server is now ready for use!

Connect to your new VPN with these details:

Server IP: server-public-ip
IPsec PSK: secret-psk
Username: vpnuser
Password: secret-password
We are not going to cover how to connect to a VPN here as it depends on your system.
You can have a deeper understanding of the container image in the official documentation .
Now we can create cargoes on any namespace we want and make them accessible from our vpn for example:
ApiVersion: v0.18

Namespace: global

# See all options:
# https://docs.next-hat.com/references/nanocl/objects/cargo
Cargoes:
- Name: deploy-example
  Containers:
  - Name: web
    Image: ghcr.io/next-hat/nanocl-get-started:latest
    Env:
    - APP=GET_STARTED1

# See all options:
# https://docs.next-hat.com/references/nanocl/objects/resource
Resources:
- Name: vpn-dns
  Kind: ncdns.io/rule/v0.10
  Data:
    Entries:
    - Name: my-domain.internal
      IpAddress: Internal

- Name: my-domain.internal
  Kind: ncproxy.io/rule/v0.15
  Data:
    Rules:
    - Domain: my-domain.internal
      Network: Internal
      Locations:
      - Path: /
        Target:
          Key: global.deploy-example.c
          Port: 9000
Notice that we use alot of private.nsp that reference to the gateway of our namespace private you may have to change it if you used a different namespace.
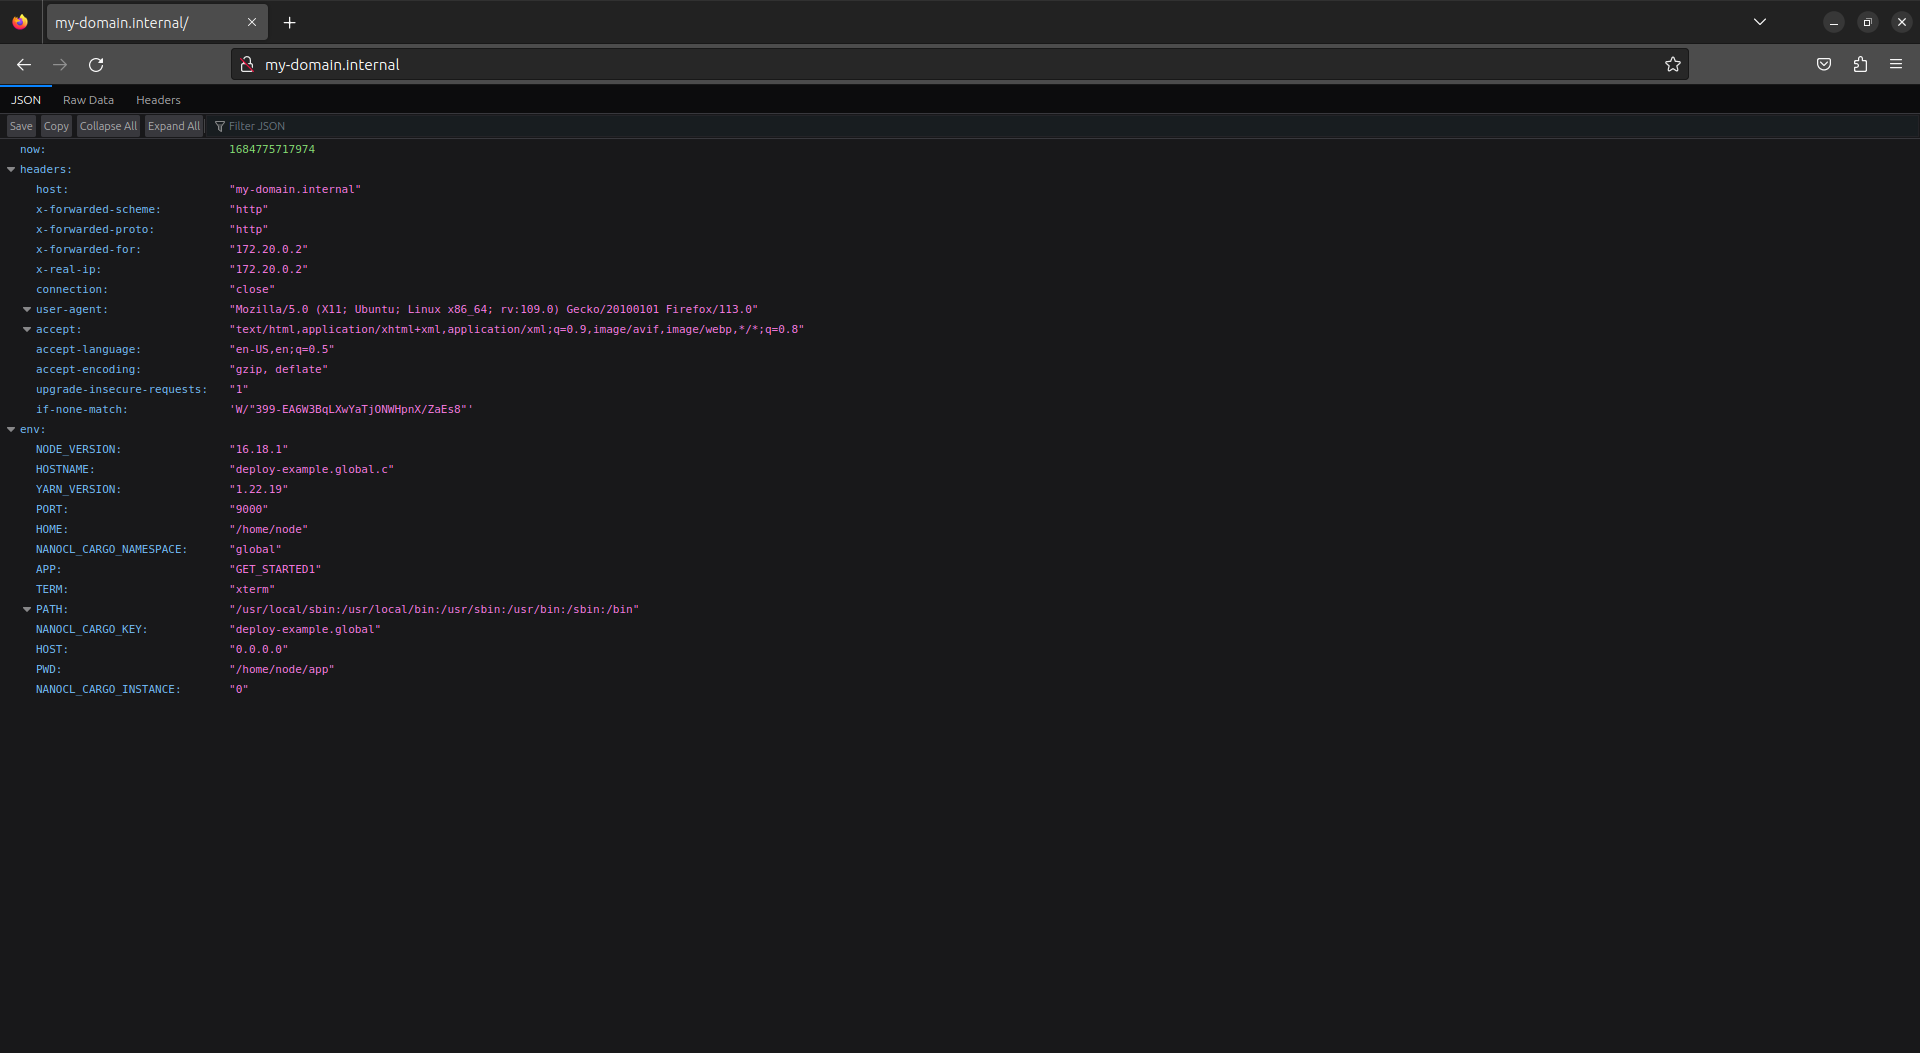
After applying this settings you should be able to access to http://my-domain.internal .